
How do you take Apidra® (insulin glulisine) injection?
There are 3 ways to administer Apidra

The Apidra SoloStar® Pen
Learn how to use the Apidra SoloStar Pen. Check out this step-by-step guide to become a Pen pro.
Step 1 – Prepare for an Injection
PLEASE REVIEW THE FULL INSTRUCTIONS FOR USE OF THE APIDRA (INSULIN GLULISINE INJECTION 100 UNITS/ML) SoloStar PEN THAT COME WITH YOUR PRESCRIPTION.
PREPARE FOR AN INJECTION
Before beginning, check the label on the insulin pen to ensure you are using the correct insulin.

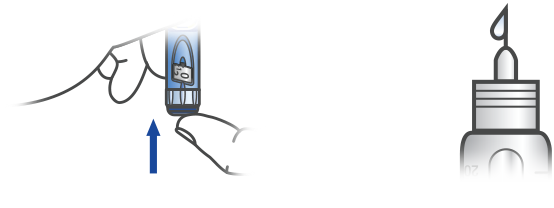
Step 2 – Attach a New Needle
ATTACH A NEW NEEDLE
Keep the needle straight as you attach it. Apidra SoloStar uses push-on or screw-on needles.

Step 3 – Perform a Safety Test
PERFORM A SAFETY TEST
This removes air bubbles and ensures that the pen and needle are working properly. Select a dose of 2 units. Always perform the safety test before each injection.

Take off the outer needle cap and keep it to remove the used needle after your injection. Then take off the inner needle cap and discard it.
Hold the pen with the needle pointing upward. Tap the reservoir gently so any air bubble rise up to the needle.
Press the injection button all the way in. Check if insulin comes out of the needle. If insulin does not come out, check for air bubbles and repeat the test 2 more times to remove them. If no insulin comes out after the third time, try again with a new needle.
Step 4 – Select Your Dose
SELECT YOUR DOSE
Be sure the dose window shows “0” following the safety test. Select your required dose in 1-unit steps. If you need a dose larger than 80 units, use 2 or more injections.

Step 5 – Inject Your Dose
INJECT YOUR DOSE
Using the method your healthcare professional showed you, insert the needle into the skin in either your upper arm, abdomen (stomach area), or thigh (upper leg).

Press the injection button in all the way. Hold the button in that position, slowly count to 10, then withdraw the needle.
Step 6 – Remove the Needle
REMOVE THE NEEDLE
Always remove the needle after each injection. Put the outer needle cap back on the needle and use it to unscrew the needle from the pen. Dispose of the needle safely, as instructed by your healthcare provider (e.g. in a sharps container). Put the cap on the pen.
If you can’t dial the dose you want, check to see if you have enough insulin in the reservoir.
If you have any other problems with the pen, first try changing the needle and repeating the safety test.
Each Apidra SoloStar is for use by one person only.
You should carefully read the instruction leaflet that comes with your pen for additional important information.

Apidra vial and syringe
Learn how to take Apidra with a syringe and vial by reading the instructional step-by-step injection guide.
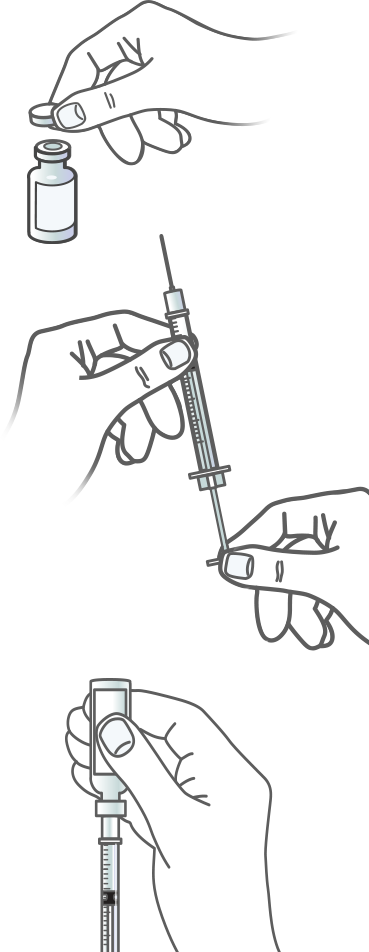
Step 1 – Prepare the Dose
PLEASE REVIEW THE FULL INSTRUCTIONS FOR USE OF THE APIDRA (INSULIN GLULISINE INJECTION 100 UNITS/ML) VIAL THAT COME WITH YOUR PRESCRIPTION
REMOVE THE CAP
If you are using a new vial of Apidra (insulin glulisine injection 100 Units/mL), remove the protective cap. Leave the stopper in place.
STERILIZE THE TOP
Wipe off the top of the vial with a clean alcohol swab.
DRAW AIR INTO THE SYRINGE
Take the syringe and pull the plunger to draw in an amount of air equal to your Apidra dose.
INJECT AIR INTO THE VIAL
Push the needle through the stopper in the vial’s top and push the plunger to inject the air into the vial.
DRAW UP THE DOSE
Leave the syringe in the vial and turn both upside down. Hold the syringe and vial firmly in one hand. Make sure the tip of the needle is in the insulin. With your free hand, pull the plunger to withdraw the correct dose into the syringe.
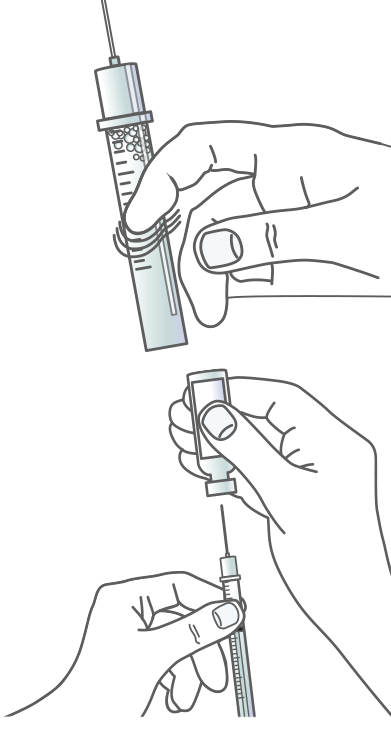
Step 2 – Remove Air Bubbles
CHECK FOR BUBBLES
Before you withdraw the needle out of the vial, check the syringe for air bubbles.
TAP TO RELEASE
If you see any air bubbles in the Apidra solution, hold the syringe straight up and tap the side of the syringe until the air bubbles rise to the top.
EJECT THE AIR
Gently push the air bubbles and insulin all the way out with the plunger. Then draw the correct dose back into the syringe.
REMOVE THE NEEDLE
Pull the needle out of the vial. Do not let the needle touch anything. You’re now ready to inject.
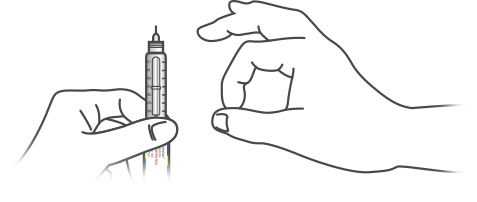
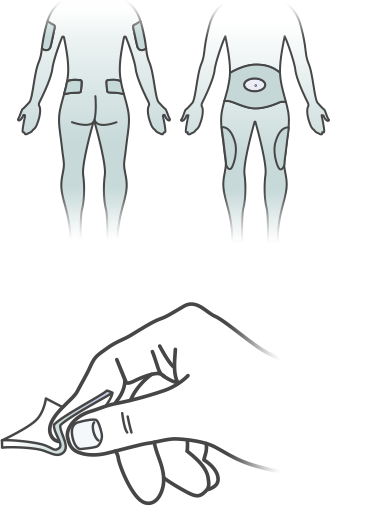
Step 3 – Choose an Injection Area
PICK YOUR SPOT
Choose an area of your skin to be injected: either your upper arm, thigh or stomach area. Rotate your injection sites with each dose to reduce your risk of getting lipodystrophy (pitted or thickened skin) and localized cutaneous amyloidosis (skin with lumps) at the injection sites. Do not use the same spot for each injection or inject where the skin is pitted, thickened, lumpy, tender, bruised, scaly, hard, scarred or damaged.
CLEAN YOUR SKIN
Use rubbing alcohol or an alcohol pad to clean the skin where you are going to inject. Alcohol can sometimes sting if it’s not completely dry when you inject, so wait a few seconds for it to evaporate or pat the area dry with a sterile cotton ball.
PINCH A FOLD OF SKIN
Pinch the skin and hold it. Insert the needle straight into the pinched skin the way your healthcare professional showed you.
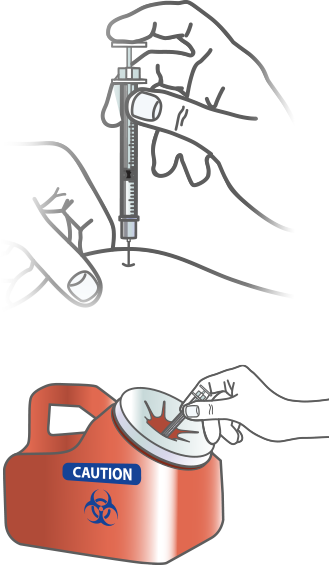
Step 4 – Complete Injection
PLEASE REVIEW THE FULL INSTRUCTIONS FOR USE OF THE APIDRA (INSULIN GLULISINE INJECTION 100 UNITS/ML) VIAL THAT COME WITH YOUR PRESCRIPTION
ADMINISTER INJECTION
Push the plunger slowly to inject the full dose of Apidra. Leave the needle in the skin for 10 seconds.
WITHDRAW THE NEEDLE
Pull the needle straight out and apply gentle pressure to the spot where you injected for several seconds. Don’t rub the area.
DISCARD MATERIALS SAFELY
Follow your healthcare professional’s instructions for throwing away the needle and syringe.

Apidra in a pump
It is important to change the Apidra reservoir at least every 48 hours to reduce the risk of pump clogs.
Need more information about using Apidra in a pump? Go to the FAQS
Dosing and Support
Find out how Apidra provides dosing flexibility around mealtime to work for you.
Savings Offers*
Learn how eligible patients with and without prescription insurance can save on Apidra.
About Apidra
Learn how Apidra can help control blood sugar at mealtime and gives you dosing flexibility around mealtime.